Knockdown ceiling texture is practical when the exposed surface needs visual forgiveness, but you don’t want another heavy finish. The decision should come after the old material is gone and the ceiling can be inspected. A sample area will tell you more than a catalog image.
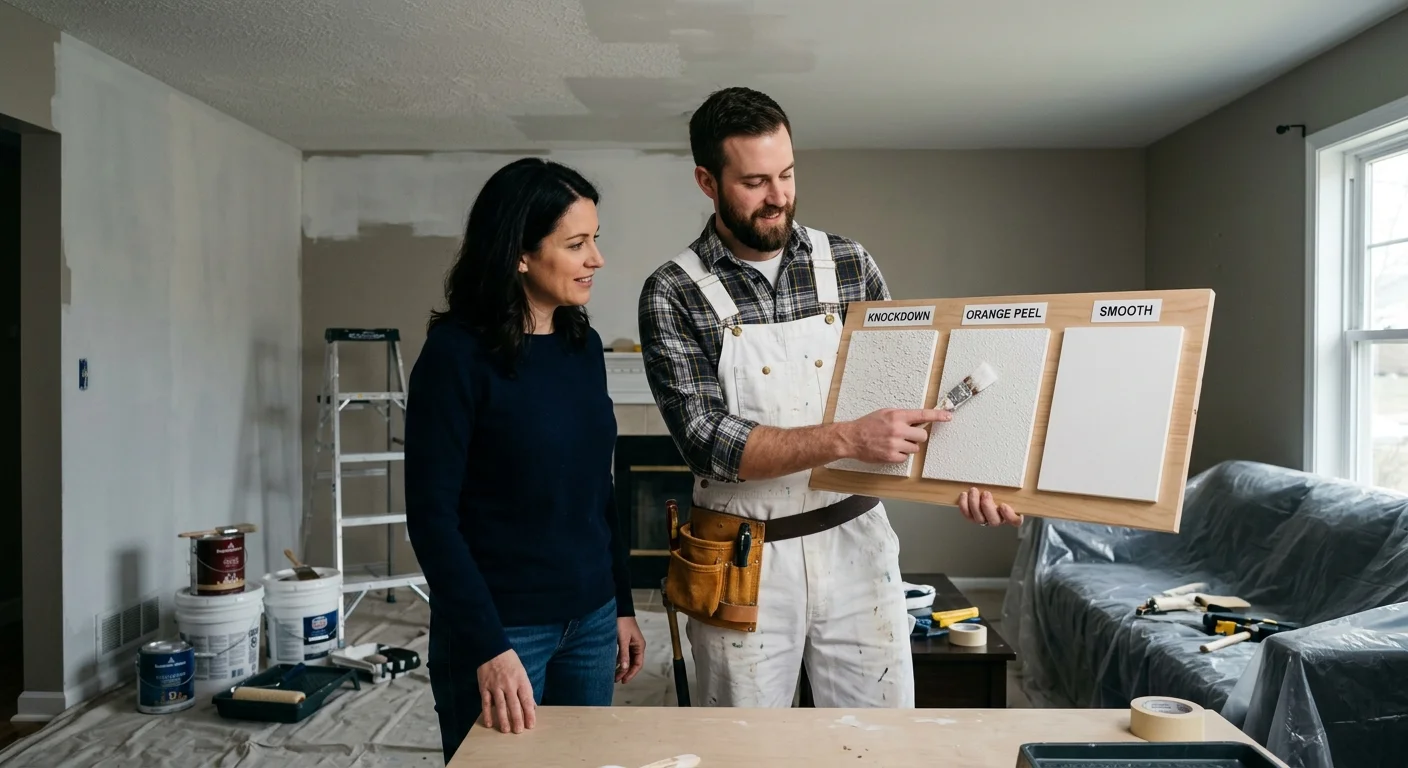
Compare knockdown with orange peel and smooth ceilings
Knockdown starts with raised texture that a painter partially flattens. The result has irregular, overlapping patches with shallow edges. Those edges catch light, so the ceiling still has movement without recreating popcorn ceiling texture.
Orange peel has a tighter, more evenly distributed pattern. Its small bumps resemble the surface of citrus skin. It can read as quieter from the floor, especially when the pattern is fine. However, it still leaves a clearly textured surface.
A smooth ceiling has no intentional texture. That simple description hides the main tradeoff. Every joint, patch, ridge, and change in the ceiling plane can affect the final appearance. Strong light from windows or fixtures can make those differences easier to see.
Knockdown often lands between those two choices. It keeps more character than orange peel and asks less of the visible surface than a smooth finish. It shouldn’t be used to bury loose material, failed seams, or damaged drywall. Those conditions need repair first.
Think about adjoining rooms, too. A new knockdown finish can look disconnected if the hallway has fine orange peel. An open layout may call for one continuous pattern. A closed bedroom gives you more freedom to change finishes at the doorway.
Our broader guide to ceiling texture types explains the visual options. For this decision, compare them on the actual ceiling. View each sample from the doorway, beneath the main light, and near the windows. A finish that looks subtle up close may read differently across the whole room.
Check the ceiling after the old texture is gone
Popcorn removal exposes the surface that will support the next finish. Don’t approve knockdown from the floor before that inspection happens. The painter should first identify visible paper damage, open seams, old patches, fastener marks, and areas that don’t share the same plane.
Look across the ceiling from several directions. Light from a window can reveal ridges that overhead lighting misses. Check the perimeter where the ceiling meets the walls. Also inspect cutouts around vents, lights, and other penetrations.
Texture isn’t a substitute for sound drywall. A deep pattern may make small visual differences less noticeable, but it doesn’t correct movement or weak material. Ask the quoting painter to separate repair work from texture work in the written scope. That makes the finish decision easier to compare.
Some ceilings need limited patching. Others need broader surface correction before any sample is useful. A local pro who handles drywall repair and texture matching can explain which visible conditions affect the final pattern. Ask the painter to mark repair areas before coating hides them.
Safety questions belong before further disturbance. Under the federal RRP rule, paid work that disturbs painted surfaces in pre-1978 housing is generally subject to certification and lead-safe work practices. Review the EPA Renovation, Repair and Painting program and confirm how it applies with the painter.
The approved project record doesn’t confirm a specific asbestos rule for this ceiling decision. If old texture remains, ask an appropriate local authority or qualified testing professional what should be checked before disturbance.
If you’re still deciding whether removal makes sense, start with our guide to repairing or removing a popcorn ceiling.
Choose a texture depth painters can repeat
A good knockdown sample isn’t just attractive. It must also be repeatable across the room. Ask the painter to create test areas that show lighter, medium, and heavier interpretations without assigning invented measurements to them.
View those samples after they’ve settled into their final shape. Stand where you normally enter the room. Then move toward the strongest natural and artificial light. Look for the size of each flattened area, the spacing between marks, and the sharpness of the edges.
A lighter knockdown tends to leave more open background visible. A heavier version creates more overlapping shapes. Neither choice is automatically better. The right depth depends on the exposed ceiling, nearby texture, lighting, and how much visual movement you want.
Once you choose a sample, document it. A photo helps, but it isn’t enough by itself. Ask the painter to record the texture material, mixture, application setup, knockdown method, and working sequence used for the approved patch. Product labels and manufacturer instructions should control any technical settings.
The same person should review how the pattern will continue around vents, corners, lights, and repaired sections. Those transitions can reveal changes in density. If several rooms connect, decide whether one approved sample governs every ceiling or whether each room receives its own mockup.
This step matters in homes across San Diego County because rooms don’t share one lighting layout. A shaded hallway in Chula Vista won’t present texture like a bright room in Oceanside. Those are design observations, not a promise that one finish performs better in either place.
Don’t approve texture from a phone photo alone. Screens change contrast and scale. The final choice belongs on the prepared ceiling where you can see it from normal viewing positions.
Plan primer and paint after the texture is finished
Texture is only one part of the finished ceiling. The scope should also explain what happens before and after application. Ask which surfaces will be protected, how repaired areas will be prepared, and which primer and ceiling coating the painter proposes.
No universal drying period or primer specification is confirmed in the approved project record. The texture manufacturer’s label and the coating’s current technical data should set those details. Ask the painter to identify both products and follow their written instructions.
Don’t let an assumed schedule replace the product directions. Conditions inside the room and the chosen materials can affect the painter’s plan. The quoting pro should explain when each layer is ready for the next step based on the applicable instructions.
Primer choice deserves a written answer. Fresh texture, exposed drywall paper, joint compound, and previously painted areas may not present the same surface. Ask how the proposed primer addresses the actual ceiling. If the painter says no primer is needed, request the coating manufacturer’s written direction supporting that choice.
Discuss sheen before the full ceiling is coated. Higher reflection can draw attention to texture edges and surface changes. Lower reflection changes that visual effect. Rather than relying on a general rule, have the painter coat part of the approved texture sample with the proposed primer and paint system.
Color matters as well. White isn’t one fixed appearance. Undertone, room light, and nearby wall colors can change how it reads. Use the same ceiling sample when reviewing color, sheen, and texture. That prevents three separate choices from producing an unexpected combination.
The California CSLB lists surface preparation and texture application within the C-33 painting classification. Before signing, use the CSLB license check to verify the contractor’s current record.
Match repairs before coating the full ceiling
Future repairs are easier when the original texture can be identified and repeated. Before the room is finished, keep a clear record of the approved sample and products. Ask whether leftover labeled material can remain with the homeowner when practical.
A repair test should happen before coating the whole ceiling when old knockdown already borders the work. The painter can compare the new patch with the surrounding pattern from several viewing positions. Matching only the texture depth isn’t enough. Density, edge shape, and transition width all affect how the repair reads.
A hard border can make a patch obvious. Ask how far the new material needs to extend for a gradual transition. The answer depends on what the painter sees after preparation. It shouldn’t be guessed before the ceiling is exposed.
Paint can also affect the match. A repaired area may share the same texture but still look different under the room’s light. Have the painter explain whether the coating scope covers only the patch or the full ceiling plane. Get that boundary in writing before work starts.
For a ceiling with several unrelated patches, compare two scopes. One may focus on individual texture matches. The other may create one consistent finish across the ceiling. The right choice depends on the visible condition, room layout, and approved sample, not a blanket rule.
Permit requirements can vary by jurisdiction. The verified county record says painting, papering, and similar finish work are exempt from building permits in unincorporated San Diego County. Individual cities may have different requirements. If the project expands beyond finish work, confirm the current requirement with the building department serving the property.
A detailed scope protects the design choice. It should distinguish removal, repairs, texture application, primer, paint, protection, and cleanup. Paint Pros San Diego can help you connect with licensed independent painters who will assess the ceiling and propose their own scopes.
Frequently asked questions
When does knockdown texture make sense after popcorn removal?
Knockdown works when the exposed surface needs some visual forgiveness but you don’t want another heavy finish. Decide after the old material is gone and the ceiling can actually be inspected, not before. A sample area tells you more than a description does.
How does knockdown compare with orange peel and a smooth ceiling?
Knockdown is raised texture that gets partially flattened, leaving irregular overlapping patches with shallow edges that catch light. Orange peel is a tighter, more even pattern of small bumps. A smooth ceiling has no intentional texture, which means every joint, patch and ridge can show. Knockdown sits between the other two.
Can texture hide bad drywall?
No. A deep pattern can make small visual differences less noticeable, but it does not correct movement or weak material. Loose material, failed seams and damaged drywall need repair first, and the written scope should separate repair work from texture work.
How do I make sure the texture is repeatable across the room?
Ask for test areas showing lighter, medium and heavier interpretations, and view them after they have settled, from where you normally enter the room and under the strongest light. Once you pick one, have the painter record the material, mixture, application setup, knockdown method and working sequence used.
What about lead-safe rules on an older ceiling?
Under the federal Renovation, Repair and Painting rule, paid work that disturbs painted surfaces in pre-1978 housing is generally subject to certification and lead-safe work practices. If old texture remains, ask an appropriate local authority or a qualified testing professional what should be checked before anything is disturbed.
When to call us
Call when the popcorn is gone, the ceiling needs repair, or you want an on-ceiling texture sample before choosing the finish. A qualified local painting pro can inspect the exposed surface and define the repair, texture, primer, and coating scope.
Call us at (858) 400-6422 and we’ll connect you with a licensed local painter.