Professional wallpaper removal in San Diego County runs $1.50 to $4.00 per square foot, so a standard 12x12 bedroom typically costs $575 to $1,530 for the removal alone. Wall repairs, skim coating, and priming add to that total depending on what’s underneath. Most rooms take a professional crew three days from strip to paint-ready surface.
Real cost ranges per square foot in 2026
In San Diego County, the cost for professional wallpaper removal typically ranges from $1.50 to $4.00 per square foot of wall space. This price is just for the removal itself. If the walls underneath are damaged and need significant repairs, the total cost will be higher.
So, for a standard 12’ x 12’ bedroom with 8-foot ceilings, you’re looking at roughly 384 square feet of wall space. The removal alone could cost between $575 and $1,530.
What pushes a project toward the higher end of that range?
- Age of the wallpaper: Older paper, especially from the 1970s or earlier, often uses aggressive, non-standard adhesives.
- Multiple layers: It was common practice to simply paper over the old layer. Each layer adds time and complexity.
- Type of wallpaper: Vinyl-coated or “strippable” papers are usually easier to remove than older, delicate paper types that shred into tiny pieces.
- Wall condition: If the drywall wasn’t properly primed before the wallpaper was installed, the drywall paper facing will likely tear away with the wallpaper, requiring extensive repairs.
We see this often in the beautiful older homes in neighborhoods like Mission Hills, Kensington, and North Park. What looks like a simple refresh can quickly become a significant restoration project. Our detailed estimates for a wallpaper removal service always account for these variables, so you know the full scope upfront.
Why old wallpaper is harder than new wallpaper
Modern wallpapers are designed with removal in mind. They often have a “strippable” backing that allows you to pull them off in large sheets with minimal fuss. Older wallpapers, however, are a different story.
Before the 1990s, most wallpapers were hung using a thick, wheat-based or cellulose paste. Over decades, this adhesive petrifies, creating a powerful bond with the drywall. It doesn’t dissolve easily with water and requires more intensive methods to break down.
Another common issue is the lack of proper wall prep. Decades ago, installers often applied wallpaper directly onto bare drywall. When this happens, the wallpaper adhesive soaks into the drywall’s paper facing. As you remove the wallpaper, you inevitably tear the surface of the wall, creating a fuzzy, uneven texture that’s impossible to paint over.
Finally, in homes built before 1978, there’s a chance that the walls behind the paper were painted with lead-based paint. Disturbing this can create hazardous dust. Professionals trained in the EPA’s Lead-Safe RRP Program follow specific protocols to contain the work area and manage dust safely. This is a critical safety consideration that a professional painting contractor is equipped to handle.
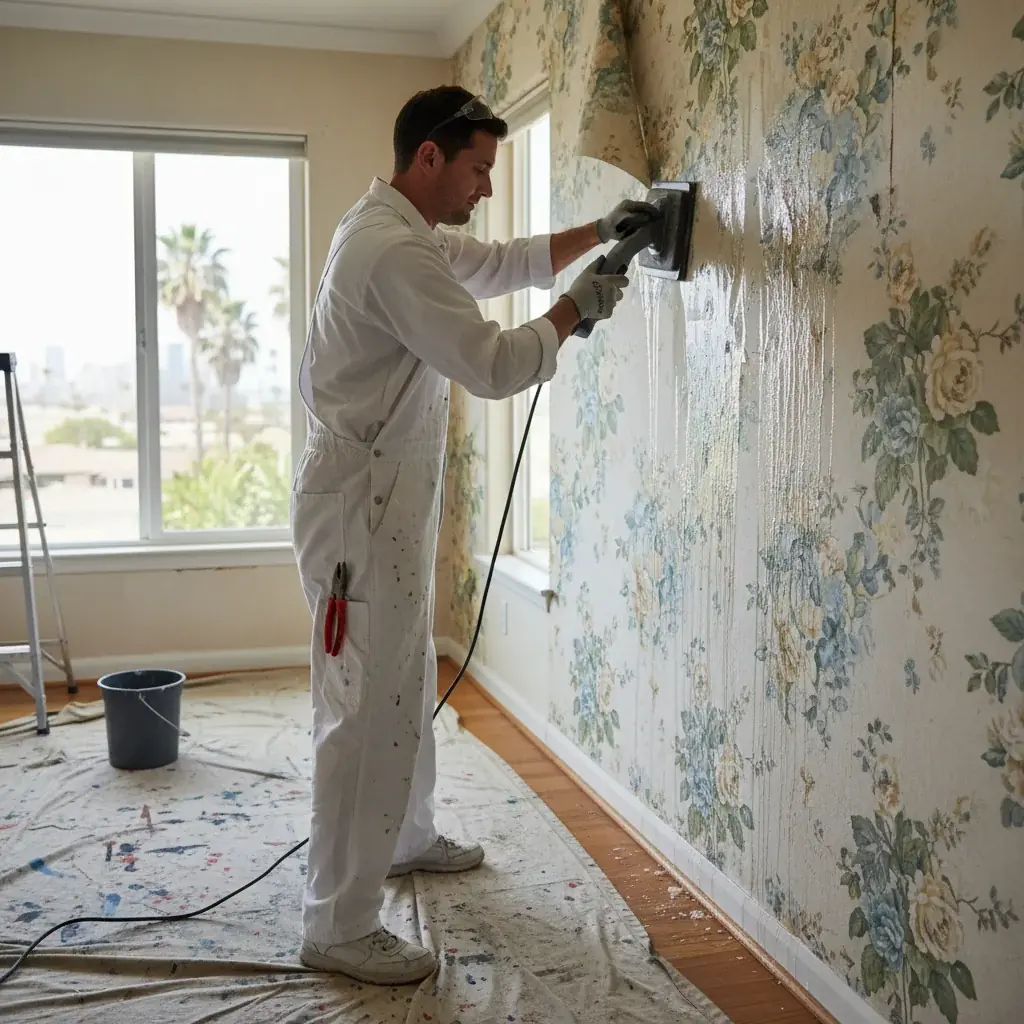
Steam vs chemical stripping: which a pro will use
When dealing with stubborn wallpaper, professionals have two primary tools: steam and chemical stripping agents. The choice depends on the type of paper, the adhesive, and the condition of the underlying wall.
Steam Stripping: A wallpaper steamer uses hot water vapor to penetrate the paper and soften the old glue. It’s highly effective, especially on porous papers and thick, old adhesives. The main benefit is that it uses only water, avoiding chemical fumes. However, it’s a slow, meticulous process. An inexperienced user can easily apply too much steam for too long, saturating the drywall and causing it to bubble or warp.
Chemical Stripping: These aren’t the harsh, smelly solvents of the past. Modern professional-grade removers are often enzyme-based, designed to break down the starches in old wallpaper paste. They are typically sprayed or rolled onto the wall, allowed to “dwell” for a period, and then the wallpaper is scraped away. This method can be faster than steaming but requires proper ventilation and careful application to protect floors and trim. A professional team knows which formulas work best for specific glues and follows all safety and environmental guidelines, including those set by California’s Air Resources Board (CARB) for low-VOC products.
In many projects, we use a combination of techniques, scoring the wallpaper, applying a stripping solution to penetrate, and using steam on particularly stubborn areas.
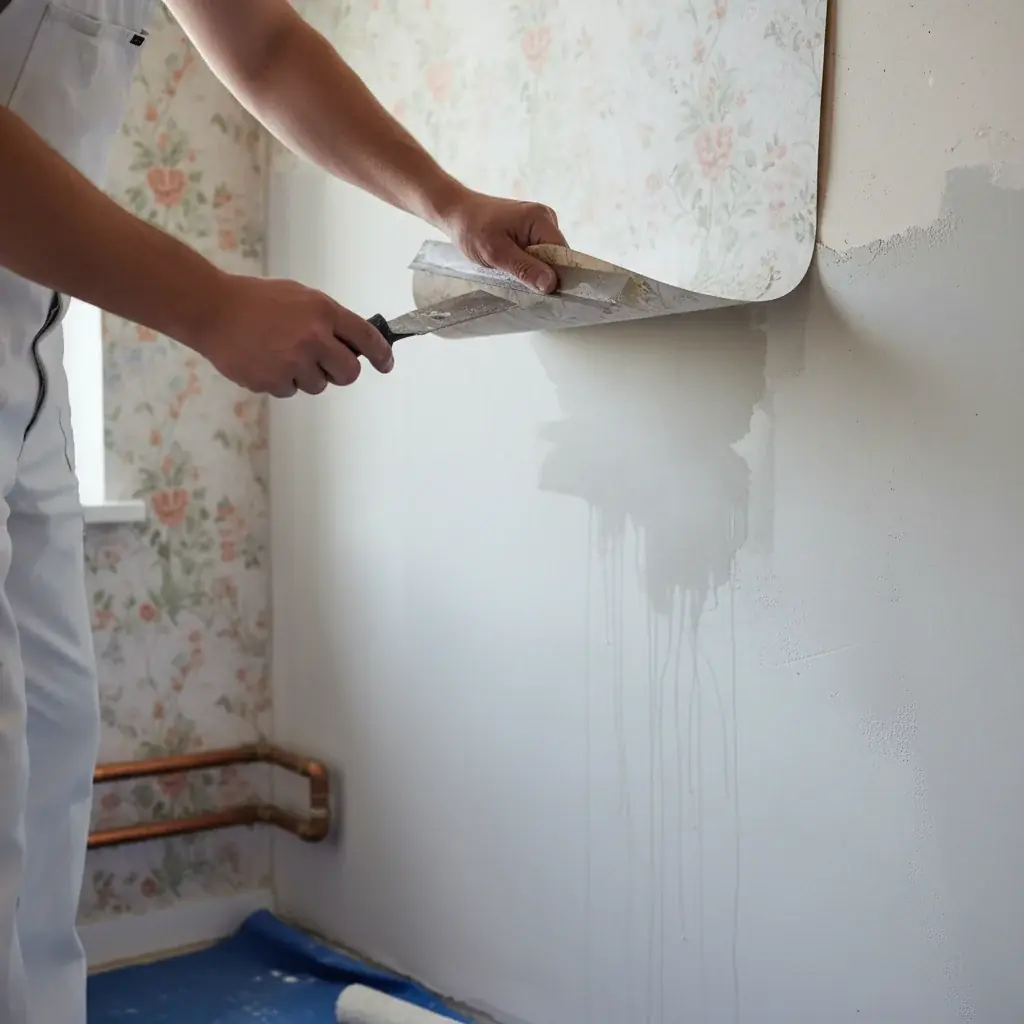
Wall repair after removal: skim coat or full prime
Removing the wallpaper is only half the battle. The next, and arguably most important, phase is preparing the walls for paint. It’s extremely rare for a wall to be paint-ready immediately after wallpaper removal. You’ll almost always have gouges from scrapers, torn drywall paper, and old adhesive residue.
Simply priming over this mess won’t work. The imperfections will show through the final paint coat, a problem known as “telegraphing.” To achieve a smooth, professional finish, the wall needs significant prep work.
Skim Coating
This is the most common and effective solution. A skim coat involves applying a thin layer of joint compound (or “mud”) over the entire surface of the wall with a wide trowel. Once it dries, it’s sanded perfectly smooth. This process fills in all the gouges, tears, and imperfections, creating a uniform, new surface. For heavily damaged walls, two or even three skim coats may be necessary. This is a core part of our drywall repair process and is essential for a high-quality paint job.
Priming
After the wall is smooth and repaired, it needs a high-quality primer. A primer does two things: it seals the new joint compound and raw drywall paper so the paint doesn’t soak in unevenly, and it provides a consistent base for the topcoat to adhere to. We typically use a PVA primer for new drywall surfaces or an oil-based primer to seal any remaining adhesive residue and prevent it from bleeding through the new paint.
When to remove vs paint over (and why painting over usually fails)
It can be tempting to just prime and paint directly over old wallpaper to save time and money. This is almost always a mistake. Painting over wallpaper is a short-term fix that often leads to long-term problems and greater expense down the road.
Here’s why it fails:
- Bubbling and Peeling: The moisture in latex paint can reactivate the old wallpaper adhesive underneath. As the paint dries, it can cause the wallpaper to bubble, lift, and peel away from the wall, taking your brand-new paint job with it.
- Visible Seams and Texture: No amount of paint can completely hide the seams between strips of wallpaper. Over time, these lines become more prominent. If the wallpaper has any kind of embossed or raised texture, that texture will also show through the paint.
- Future Removal is Harder: Painting over wallpaper essentially seals it to the wall with an extra layer. When you or a future homeowner eventually decides to remove it, the job becomes exponentially more difficult, time-consuming, and costly.
The only time you might even consider painting over wallpaper is if it’s a single, perfectly smooth, and incredibly well-adhered layer. Even then, it’s a gamble. The professional standard is always to remove the wallpaper completely. This ensures your investment in a new interior painting job will last for years and look flawless.
How long a typical room takes
Wallpaper removal and wall preparation is not a one-day job. A professional crew works efficiently, but the process requires patience and drying time.
Here’s a realistic timeline for a standard 12’ x 12’ room:
- Day 1: Prep and Removal. The team will spend the first few hours protecting your floors, furniture, and fixtures with plastic and drop cloths. The rest of the day is dedicated to stripping the wallpaper using the most effective method.
- Day 2: First Skim Coat and Drying. After cleaning the walls of any remaining adhesive, the first skim coat is applied to repair all the damage. This needs several hours, often overnight, to dry completely.
- Day 3: Sanding and Final Prep. The dried skim coat is sanded smooth. Depending on the level of damage, a second, thinner skim coat may be applied to fill any remaining low spots. Once that’s dry and sanded, the walls are wiped clean, and a full coat of primer is applied.
Only after these three days of intensive prep work is the wall actually ready for the first coat of finish paint. Rushing any of these steps will compromise the final result.
Frequently asked questions
How much does wallpaper removal cost in San Diego? Professional wallpaper removal in San Diego County runs $1.50 to $4.00 per square foot of wall space. A standard 12x12 bedroom lands between $575 and $1,530 for removal only. Wall repairs and skim coating add to that total depending on the condition of the drywall underneath.
Is it worth paying a professional to remove wallpaper? Yes, for most San Diego homes it’s worth it. Older homes in neighborhoods like Mission Hills, Kensington, and North Park often have multiple layers and aggressive adhesives that shred drywall if removed without the right technique. A professional avoids the wall damage that turns a removal job into a full drywall repair project.
How long does wallpaper removal take? A professional crew typically needs three days for a standard room: day one for protection and stripping, day two for the first skim coat to dry, and day three for sanding, a second skim coat if needed, and priming. Rushing drying time causes the imperfections to telegraph through the final paint coat.
Do I need to repair walls after removing wallpaper? Almost always, yes. Scrapers leave gouges, and if the original drywall wasn’t primed before installation, the paper facing tears away during removal. A skim coat of joint compound followed by a PVA or oil-based primer is the standard fix before any paint goes on.
Can I just paint over old wallpaper instead of removing it? It’s almost always a mistake. Latex paint reactivates the old adhesive, causing bubbling and peeling. Wallpaper seams and texture show through the paint over time. And if removal becomes necessary later, the sealed-on paper is far harder and more expensive to strip.
Does the age of wallpaper affect the removal cost? Yes, significantly. Paper hung before the 1990s often used wheat-based or cellulose paste that petrifies over decades. Vinyl-coated or strippable modern papers come off faster. In homes built before 1978, lead-based paint behind the wallpaper requires additional containment protocols, which adds time and cost.
When to call us
If you’re looking at old, peeling, or multi-layered wallpaper in your home and feeling overwhelmed, that’s the time to call in a professional. What might take a homeowner weeks of frustrating work, we can typically handle in a few days. We have the right tools, materials, and experience to remove the paper, repair the underlying walls, and deliver a perfectly smooth surface ready for a new look.
Call us at (858) 925-5546 for a same-day estimate.